
|
|
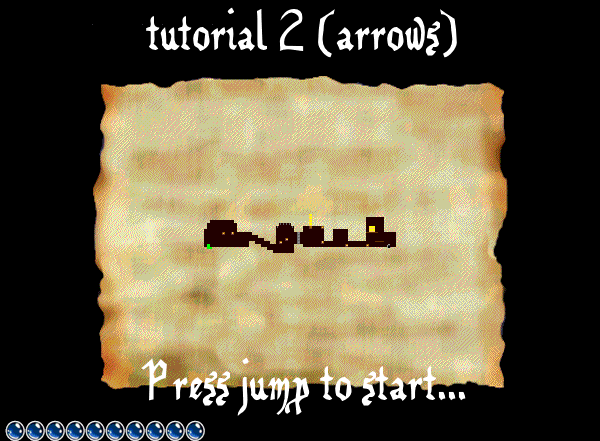
| tutorial 2 (arrows) Thursday, August 20, 2009 7:21 pm — Guide posted by canadianstickdeath |


 ShareThis
« canadianstickdeath's Blog
Level Introduction
 |
Click here for the level code for this level.
Tutorial 2 is probably my least favourite of all the HATPC levels. In my opinion, it's too short and very poorly designed. But, I guess, "tutorial 2 (arrows)"'s purpose wasn't for it to be an enthralling level, but to explain one of HATPC's more important objects -- arrows. It's difficult to make a trap without them. I mean, sure, you have things like the dynamite crates and the boulders, but those are harder to use and not as versatile. So does tutorial 2 succeed in explaining arrows? Mostly. Here's the biggest fail:
 |
 |
Evidently, the people at Neopets don't know how to count. Or, perhaps more likely, there used to be three arrows, but, for whatever reason, they decided to take one out. Actually, once you beat the game, they claim there's 26 gems in total, while there are only 25 (and two of those aren't even reachable), so, on second thought, yeah they don't know how to count.
Walkthrough
Press jump to start? Wait, what do I press to jump again? Space? Alright then.
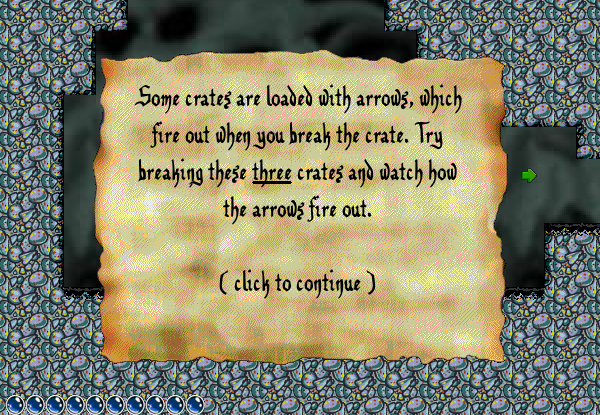
Start by heading to the right, and read the level's first tutorial message. Read it? OK good. See those arrows crates up there? You'll want to hit those, and get a look at how arrows work for the first time. When you hit one, an arrow will pop out and fly across the level in the direction indicated on the crate. Be very careful never to touch these flying arrows, as you will lose a life if you do. Also, be very careful when breaking arrow crates as well. Things won't go very well for Hannah if she's standing right in front of the arrow when it gets fired, will it? When triggering these particular arrow crates, just make sure you hit them by jumping up from directly below. If you hit it from the sides there is an increased chance that one of them will hit you.
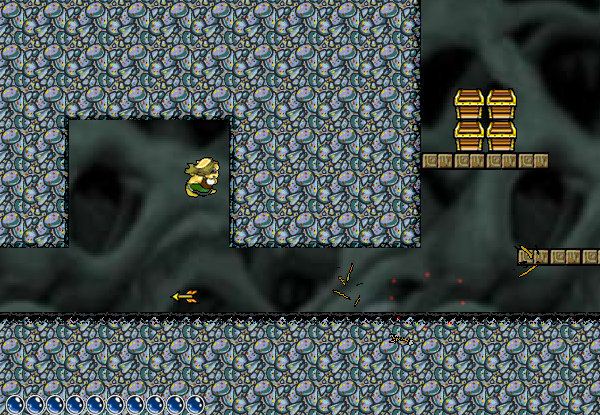
Continue to the right (a lot of going right in this level) and you will be faced with a message telling you that arrows can be used to destroy crates (they'll destroy ladders and platforms as well). Use the two arrow crates in this room to blow a hole in a stack of metal crates, so that you can continue into the next. Make sure you give each arrow enough time to hit the metal crate before triggering the next, since it is possible that, if you hit the rightmost arrow too quickly after the leftmost, both metal crates won't be destroyed as planned. But, if that does indeed occur, you can use a glitch to pass through anyway. We'll have an article here about that glitch eventually, but for now, just know that you can get through if you just keep jumping at the corner until you get stuck.
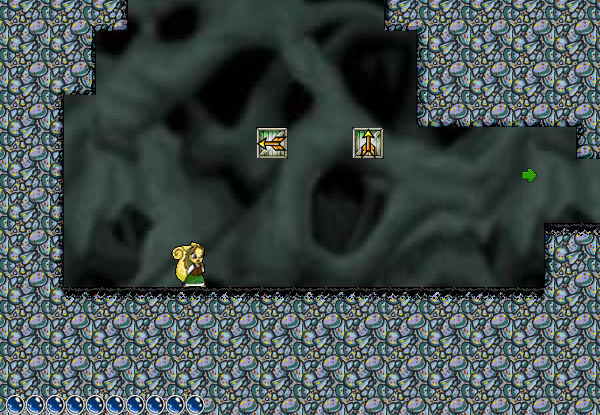
Next up, continue to the right. Now you'll be shown how arrows can trigger other arrows. Wow! Trigger the up-facing arrow and collect the four treasures that fall down as a result. Once again, be very careful when triggering arrows. Don't, for example, try to trigger this arrow crate by jumping on top of it, because, then, obviously, you'll be in the path of the arrow as soon as it is fires. Now, I'm not saying it's not possible to jump on this arrow crate, trigger the arrow, and live to tell about it, but what I am saying is that there's no reason to take chances like that, when it'll be much safer just to trigger the arrow from the sides or from below.
Continue to the right. You know, if this level were any more straight-forward... Nevermind. It couldn't be. Next you'll be told that arrows hurt. If you've been reading my walkthrough up until this point, you'd know that already. When you hit this next arrow (and it's impossible to avoid), another arrow will be launched back at you. To avoid it, you can either use the open space to jump over it, or, alternatively, you can run back in the other direction and avoid it by standing on the higher terrain to the left. Honestly, it's probably about as easy to jump over it.
 |
And that's about it, head to the right, collect the remaining treasure and exit through the newly-opened door. LEVEL COMPLETED! Yay!
 |
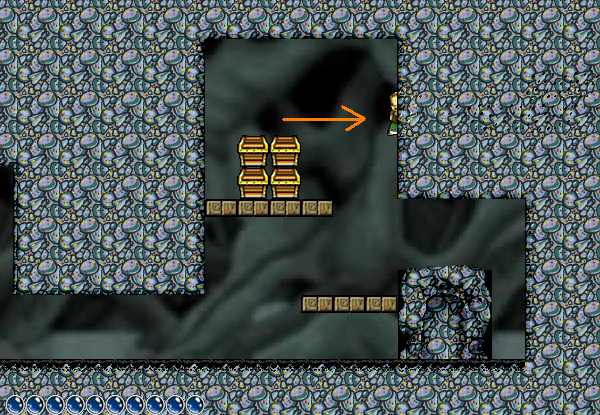
What do you mean you didn't listen to me when I just told you to enter the door? What's that? You remember how I told you about gems and how there's usually one on every level, and you want to get the one on this level? Well let's get on that! See that image below? That arrow's pointing at where the secret area is that leads to the gem. You might have noticed this by now, but you can usually see where a secret area is by looking; the terrain appears to have holes in it. I imagine this is so that, while standing inside of it, you can sort-of make out where you character is standing.
The height of the entrance to the secret area is only two squares, and when it's this short, you won't always manage to get in on the first jump. If you miss, just keep jumping at that wall until you get in. Also, be careful not to accidentally enter the door should you miss. Actually, it might be an idea to leave those last four treasures for after you get the gem, just to be safe. After you get into the secret area, crawl to the right, get the gem at the end of the secret area, and then return back to the left (whoa!). | |
Video-Walkthrough
Made by Livio
Max-Points
Once again, there's not much to getting the max-points in this level. As long as you get the break all the arrow crates, get the gem, and complete the level, you've seen all there is to see. There's no need for a second video showing the max-points in this case. Also, there's no "unnecessary risks" that'd need to be mitigated for a high-score run. The next level, however, will be the first to break this trend that we've been having over the first two levels, and will contain additional steps that must be taken in order to get the maximum points.
| "tutorial 2 (arrows)" max-point level stats: |
| In-level points | 875 |
| Treasures | 8 |
| Gem? | Yes |
| Extra Life? | No |
| End-of-level points | 9000 |
| Total points for this level | 9875 |
| Maximum points so far | 25940 |
| Remaining Lives | 4 |
Go back to tutorial 1 (basic training) || Continue to tutorial 3 (boulders)
| Isa | ||
| No. I'm an octopus. Age: 31 Karma: 686 Posts: 7833 Gender: Male Location: Uppsala, Sweden - GMT +1 pm | email |
Lol, someone approved this? | |
| jellsprout | ||
| Lord of Sprout Tower Karma: -2147482799 Posts: 6445 Gender: Male pm | email |
It's part of the series. I added the necessary stuff and approved it out of principel. Spoiler: | |
| Livio | ||
Age: 31 Karma: 470 Posts: 9620 Gender: Male Location: Arizona, USA pm | email |
I thought this would be a boring article, but it was mildly amusing. | |
| Yaya | ||
Age: 29 Karma: 747 Posts: 5367 Location: Ohio (US) pm | email |
I agree, it made me laugh actually.  COMING SOON: A giant meteor. Please. Give me +karma. Give me +karma. | |
| shos | ||
| ~Jack of all trades~ Age: 31 Karma: 389 Posts: 8273 Gender: Male Location: Israel pm | email |
quite funny, there are 11 'right's in this article.  | |
| rocket guy | ||
Age: 21 Karma: -34 Posts: 39 Gender: Male pm | email |
                                    w00t somebody told me bang jan was a noob | |
| hugebutt184 | ||
| Im gonna grow a beard Karma: 0 Posts: 7 Gender: Male Location: london pm | email |
that how im feeling now cause i can't upload cavemaker. well, i did but it said the folder was invalid. neopet cant count, no, unless its that point towards each other glicth. hangon no because of the lame booby trap at the end EJLyness | |
| Quirvy | ||
| Â Â Karma: 655 Posts: 7753 Gender: Male pm | email |
'rocket guy' said:  spooky secret | |
| shos | ||
| ~Jack of all trades~ Age: 31 Karma: 389 Posts: 8273 Gender: Male Location: Israel pm | email |
'rocket guy' said: 'The last quote is of a post which has a karma of(oh, just ignore the said: )' said: -6 | |
| canadianstickdeath | ||
Age: 35 Karma: 350 Posts: 2990 Gender: Male pm | email |
"that how im feeling now cause i can't upload cavemaker. well, i did but it said the folder was invalid." Do you wanna clarify this a little bit? I don't quite understand what you mean, but we can probably help you. Actually, if you head over to the "Starter's Guide", in the guides section, there's a link there to our own cavemaker, which you can try instead? | |


« Forum Index < The Hannah and the Pirate Caves Board
In order to post in the forums, you must be logged into your account.
Click here to login.
All games copyrighted to their respective owners.